Showing posts with label Setups. Show all posts

Saturday, December 31, 2011

Happy New Year with Some Previews

Though I have a huge update of work coming up next that I did for the wonderful Karen Leblanc of her wall hangings, I thought I'd just take the time to wish everyone a Happy New Year and tease a few images from my steampunk series. I'm pretty sure the series is going to be called "Windows on a World of Steam", but that could change as I think about it more. Since the images are huge I just crop a little teaser selection of my two new images, they don't show much, but are hopefully interesting.


Well that's all for now, again Happy New Year!

-Larry M. Holder

Sunday, October 2, 2011

Some Easily Constructed Tools I Use For Lighting

In this post I thought I would go over some of the tools I've been constructing to help me in my pursuit of interesting product photo lighting. Most of these tools have a professional version that in most cases can cost a good sum of money, so I decided to try and construct some of these tools to save on unnecessary costs at this time. Although they don't look pretty they do work in most respects. First and foremost, is my product shooting table. It was a long construction project but well worth it, although it is not designed for heavy loads, seeing as it's made from foam board, nor very tall objects.


The back of the table can be expanded taller and backdrop can be attached to the expansion, however I'm finding the back piece is having a hard time holding the weight of the expansion, but with a stand to prop it up it stays in position. Something to try and fix in the future. 


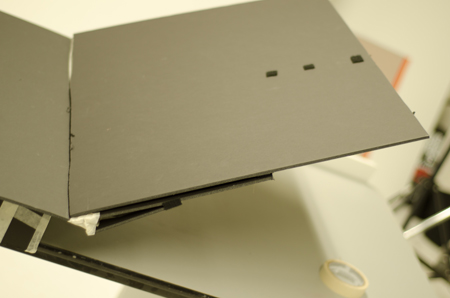
There are also side panels that attach to the side, they are white for the purpose of further reflecting the light toward the object in the middle. You can also see the backdrops as they attach in the below pictures.


The advantage of having this table is that it performs the same job as the professional models, is light weight and the way it has been designed is extremely collapsable for storage and travel.

The next two items I want to present to you are modifiers for my on camera flash units. The first is a covering designed to mimic a background light reflector for the studio. It fits on to my Metz flash and does it's job quite nicely. For an example on a studio background light, look to my photos of Kayleigh Smith in one of my previous posts, and compare it to the shot of the Pentex SLR camera which I used the device I'm displaying here in. I believe it's a very successful and useful tool, and I plan to use it quite often from now on. Below I have shots of the reflector so you have a better idea of it's function.


The last device I want to share with you is a light modifier for my Nikon flash unit. In basic terms, it lets me easily place light filters over the flash to make cool effects and soften the light. I've so far been using it as a fill light combined with two studio lights in my product studies. Below are images of the modifier and some new example of images I used it on.


Some of these images also have coloured gels at work as well, that is the main focus on the modifier, but, as seen in the cassette tape image, it can be used as a small focused soft box with something as simple as a piece of white paper on the end of the modifier. That's all for now folks - Larry M. Holder


Friday, September 23, 2011

Lighting Tests for Product Photos

Part of my studies this year is leaning the art and stylings of product photography. I have a pretty good understanding of the technics and equipment needed to capture great product shots, however I still feel the need to test out certain unorthodox types of lighting setups. This is mainly being driving by budget, I'm trying to figure the most cost effective ways of making great and compelling product work. My focus in this particular field is being geared toward making stills for artists of their work for web, grant or portfolio use. Yet I still wish to show them alternative methods for advertising images that are not of the norm. In the last 3 weeks I've focused on one, two and three light setups, using AlienBee 800, White Lightning 1600, a Metz 45 CT-1 and a Nikon SB-27. The studio lights I was testing to see if they were worth purchasing, I settled on the idea of getting two of the AlienBee 800's, the two smaller camera flashes I was testing to see if they were a viable stand in for bigger lights and so far, with the help of a make shift back drop reflector, they seem to be doing the job. I tested with some coloured gels on the flash units as well, it's a staple in my art work, so I decided to test it on these shots, they look great, but would never work for grant applications or art magazine ads, as true colour is a must is presenting the work in those cases. Still it is a creative option for a website if the artist is interested. One other thing I'm trying is using inexpensive foam board as my back drops and reflectors, it seems to be working well. All of these shots have a hard directed light setup, my next tests will move into softer and wider light ranges more in sync with the norm in the field. Below are some test images a a few setups from my 3 light shoot.
- Larry M.Holder